

Writing: chapters, scenes and the editor
Add and reorder chapters and scenes, format text, scene breaks, word targets and statuses.
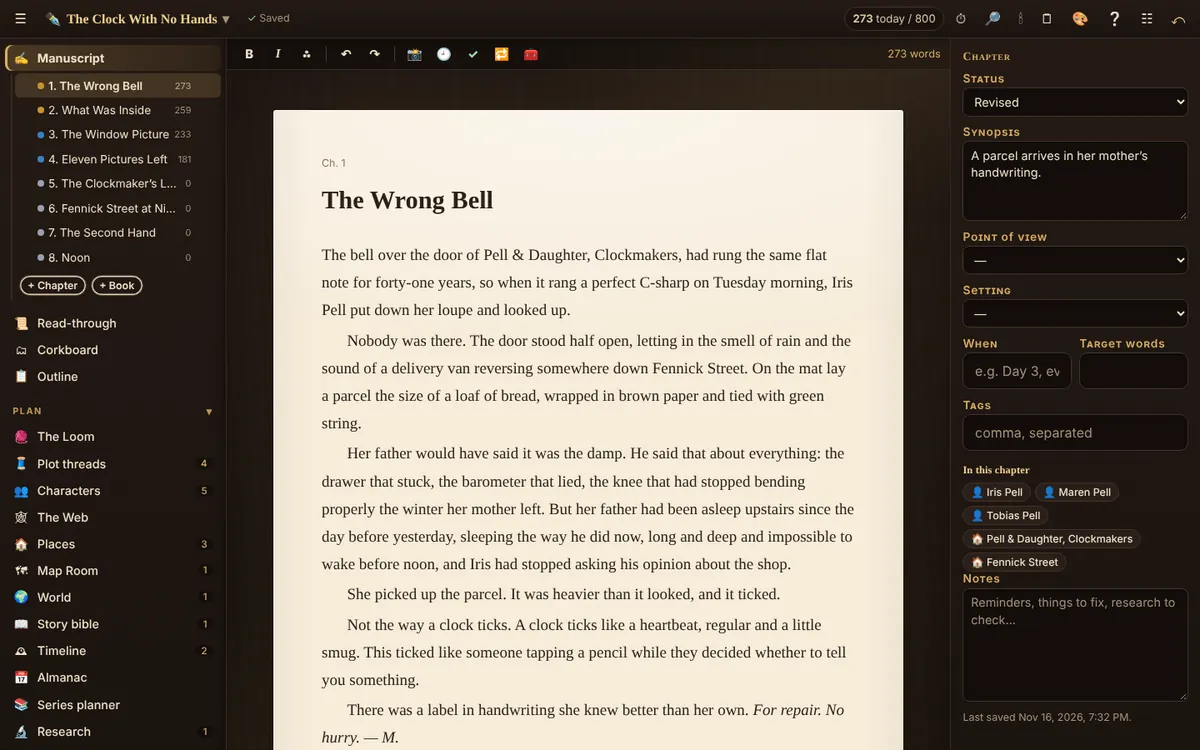
Chapters and scenes
- Add a chapter: + Chapter at the bottom of the left panel, or at the end of the current chapter.
- Add a scene: open a chapter’s menu (⋯) in the left panel and choose Add scene. Scenes are optional; many authors just write chapters.
- Reorder: drag chapters and scenes in the left panel. Numbers update by themselves.
- Prologue or part page: chapter menu → Don’t number this.
- Rename: click the title above the text.
The editor
The toolbar has italic, bold, a scene break (or press Ctrl+Shift+Enter), headings, 📸 a snapshot, and three checks: grammar and spelling, the style check, and the Word Chest for the word you’ve selected.
Double-click a character’s or place’s name in your text to see its card.
The inspector
For each chapter or scene: its status (idea, draft, revised, final), point of view character, place, a one-line synopsis, a word target, and notes to yourself. Below that, every character, place and world entry named in the text.
Statuses matter later: Send to Readers checks that every chapter is marked revised or final.
Related
- Snapshots: go back to an earlier version · Automatic daily snapshots and your own, with a side-by-side comparison and restore.
- Jäsennys · Every chapter and scene in a table: status, point of view, place, words and synopsis.
- Corkboard · Your chapters as index cards: drag to reorder, write a synopsis on each card.
- Grammar and spelling check · Checked on your own computer by Harper. Your text never leaves it.
Still stuck, or something here is wrong? Tell us and we’ll fix it.