

Cover Studio: ebook, paperback and hardcover covers
Design the front, spine and back with print guides, curved text, filters and an art library, then export a print-ready PDF.
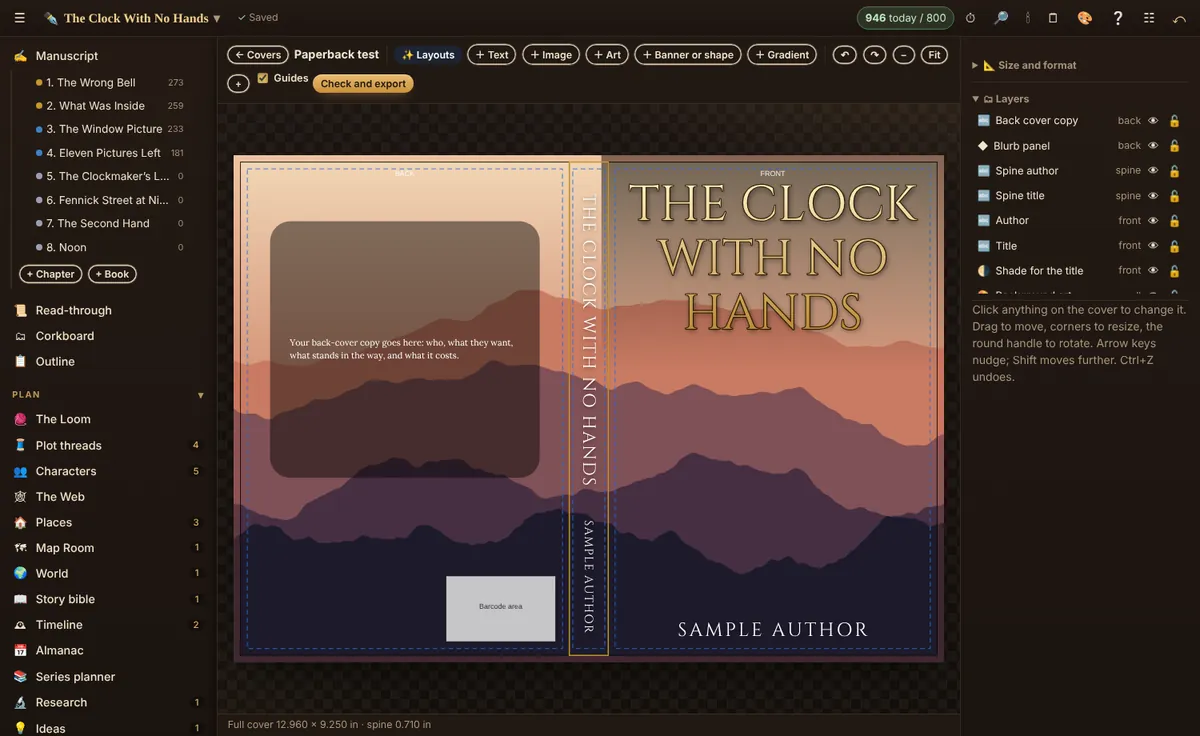
Open Cover Studio under Publish in the Writing Desk. Each cover is saved with your project and encrypted like everything else; images you upload stay encrypted with it.
1. Choose the format
- Ebook: 1600 × 2560 pixels, the size KDP recommends, which suits Apple Books, Kobo, Barnes & Noble and Google Play too.
- Audiobook: a 3000 × 3000 pixel square.
- Paperback, Amazon KDP: choose the trim size, the paper and ink, and your page count. The studio works out the spine from KDP’s published paper thicknesses and lays out back, spine and front with 0.125 in of bleed.
- From your printer’s template: for Barnes & Noble Press, IngramSpark and KDP hardcovers. These printers work the size out in their own cover template tool, so download it and copy in the full cover width and height and the spine width; add the bleed or wrap and, for hardcovers, the hinge (starting values are filled in when you pick the printer). The studio builds the front and back panels from those numbers, so the file matches the template exactly.
2. Start from a layout, or from nothing
✨ Layouts offers genre starters (epic fantasy, science fiction, thriller, romance, horror, literary, western, cozy mystery, myth and legend, crime noir). Each puts in art, your title and author name sized to fit, and on print covers the spine text and a back-cover blurb panel. Change anything afterwards.
3. Add and arrange layers
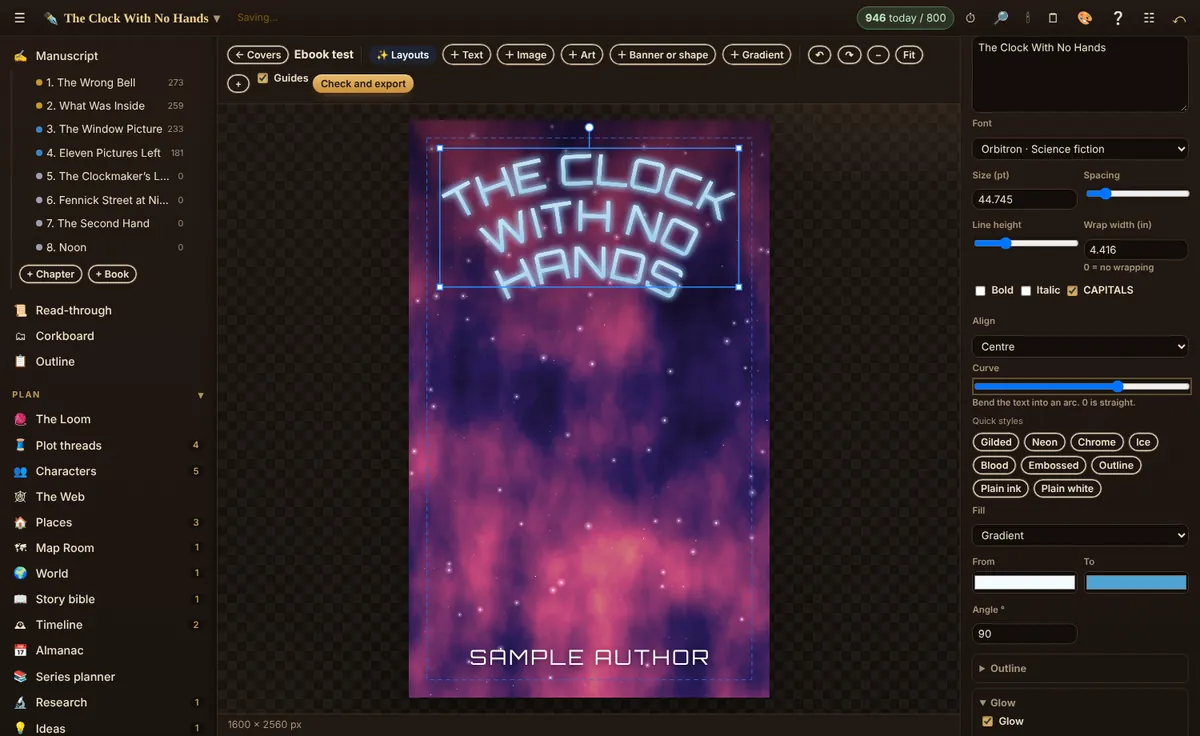
- + Text: 121 fonts served from our own server, each labelled with the genres it suits. Size, bold, italic, capitals, letter spacing, line height, wrapping, a solid or gradient fill, an outline, a glow, a shadow, and curve to bend words into an arch. Quick styles: Gilded, Neon, Chrome, Ice, Blood, Embossed, Outline and plain.
- + Image: upload your own art or photo. It’s read on your computer and stored encrypted. Choose a look (Noir, Faded film, Golden hour, Cold steel, Teal and orange, Sepia, Dreamy, Blood moon, Frost, Punchy), or adjust brightness, contrast, colour, hue, warmth, blur, grain and vignette yourself, make a duotone, and fade any edge to transparent.
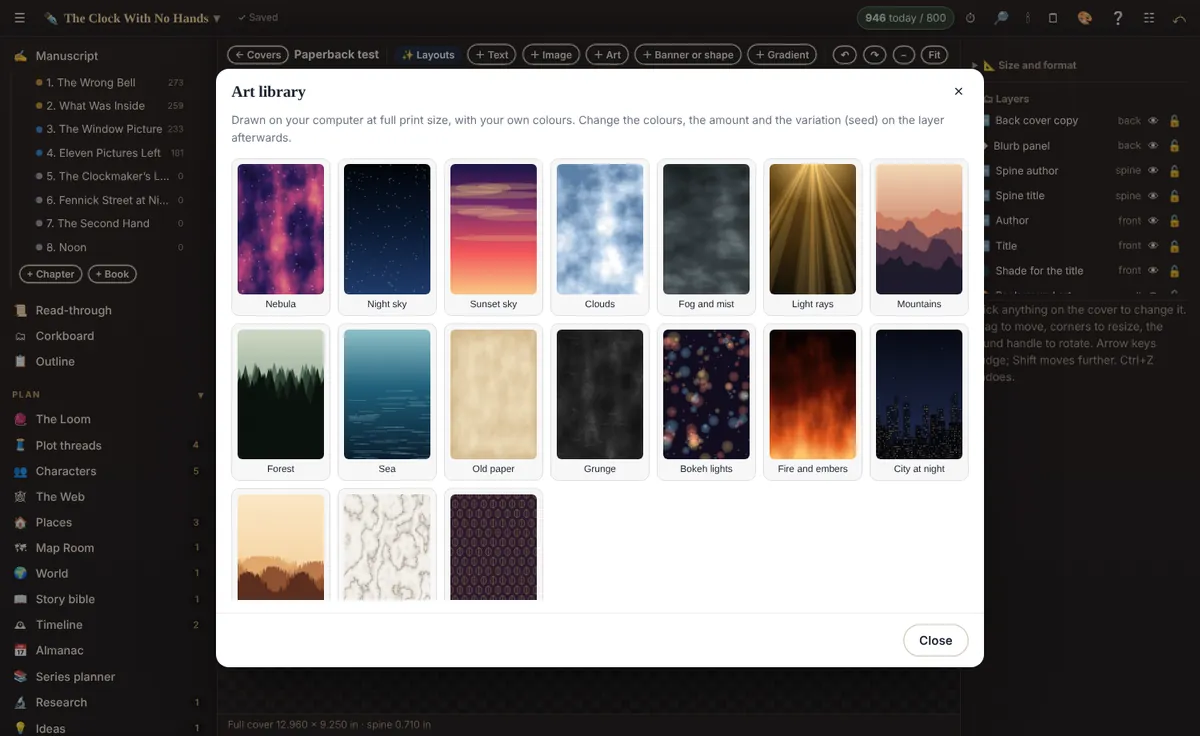
- + Art: a library of backgrounds drawn on your computer at full print size: nebula, night sky, sunset, clouds, fog, light rays, mountains, forest, sea, old paper, grunge, bokeh lights, fire and embers, a city at night, desert dunes, marble and pattern. Pick your own colours, the amount, and 🎲 New variation for a different one.
- + Banner or shape: banners, ribbons, scrolls, seals, stars, lines, ornate rules, frames, art deco frames and corner brackets.
- + Gradient: a shade behind a title so it reads clearly over busy art.
Click anything to select it. Drag to move (it snaps to the centre lines), drag a corner to resize, drag the round handle to rotate (Shift for free rotation). Arrow keys nudge; Shift nudges further. Ctrl+D duplicates, Delete removes, Ctrl+Z undoes. In the panel on the right: put a layer on the front, back, spine or whole cover, change its blend mode (multiply, screen, overlay and more), opacity, order, lock or hide it, flip it, or Fill to the edges so it reaches the bleed.
Editing pictures and words
Click a layer and its settings open on the right. For a picture:
- ✂ Crop and zoom: zoom in and slide the picture inside its box.
- 🎯 Remove a colour: press 💧 Pick from the picture, click a plain sky or backdrop, then widen Range until it’s gone and soften the edge.
- 🧽 Eraser: choose Erase and paint over the parts to remove, or Restore to bring them back. Set the brush size and softness; press Done (or Esc) to go back to moving layers. Nothing is lost from the original picture, and Undo all erasing puts it back.
- Adjust, Look and Fade the edges change colour, mood and edges.
Fonts: press the font name in a text’s settings to browse 121 fonts (all licensed for covers; why no uploads), grouped by style (serif, big block, bubble and fun, script, fantasy and gothic, horror, sci-fi, western, hand-drawn) and shown in your own words. All are free for commercial use, book covers included.
For words: Quick styles, Outline, Glow, Curve (text along an arc), a gradient, or Fill → A picture to show a picture inside the letters (big bold type works best).
While you drag, layers snap to the centre and edges of the cover and to each other, with a pink guide line. Hold Alt to place freely.
Layer order: the top of the Layers list is in front. Drag a row up or down, or use ⤒ Front, ▲ Forward, ▼ Back and ⤓ Back of all (Ctrl+] and Ctrl+[ step forward and back; add Shift to go all the way).
4. Read the guides
Shaded red is the bleed (or the hardcover wrap) that gets trimmed or folded. The black line is the trim, the gold box the spine, and the dashed blue line the safe area: keep words inside it. On hardcovers the blue bands are the hinges. The white box on the back is the barcode area; KDP prints its barcode there unless you supply your own. A red spine means your book is too short for spine text (KDP prints spine text only on books over 79 pages).
5. Check and export
Enlarge for print
Print covers need pictures at about 300 dpi; KDP refuses print covers under 200. Select a picture layer and open 🖨 Enlarge for print. It shows how sharp the picture prints at its current size, and offers two ways to enlarge it. Both run on your own device: nothing is uploaded, and no AI allowance or account is used.
- AI enlarge rebuilds fine detail (an open-source ESRGAN model running in your browser). Fastest on a computer: about half a minute to a few minutes. The first time, your browser downloads about 4 MB once.
- Quick enlarge takes a second on any device. It adds pixels smoothly but can’t add detail, so it suits soft, painted or textured pictures best.
The enlarged copy replaces the picture on your cover; the original stays in your project and Ctrl+Z puts it back. The check then shows the new dpi and reminds you it was enlarged: always look at it at full size before you upload. Pictures with see-through parts use Quick enlarge, because the AI fills transparency in. Picture credits and the AI-artwork note carry over to the enlarged copy.
Check and export runs a pre-flight check first: title on the front, words inside the safe area, nothing over the barcode, no spine text on short books, and images sharp enough to print (300 dpi is best). Then download:
- Ebook: JPG (or PNG).
- Print: one PDF page at the exact full-cover size, 300 dpi, flattened, with no crop marks, which is how KDP and B&N ask for it. Also a front-only JPG for your store page, and a layout guide picture showing every line.
Cover Studio, with its image library, texture library and optional AI artwork, comes with the Writing Desk ($36 a year) or Cliff Hanger. If you made covers on a free account before, they stay saved in your project and open again when you upgrade.
Colours are RGB, which KDP and B&N accept; their printers convert for print, so very bright colours can print slightly duller than they look on screen.
Related
- Spine Rule: paperback cover size · The full cover size, spine width and a printable template for your paperback.
- AI Artwork for covers · Optional pictures made from a description you write. Download every one you want to keep: we hold them for 24 hours, then delete them.
- The Press: ePub, Word and print-ready PDF · Compile your book for Kindle and every store, a manuscript for agents, or a paperback or hardcover interior typeset for KDP and Barnes & Noble Press.
- Query Desk · Query letter, synopsis, blurb, logline, comparable titles and bio, plus a tracker for every submission.
Still stuck, or something here is wrong? Tell us and we’ll fix it.